Map: Difference between revisions
(→Fights) |
(→Fights: compactified) |
||
| Line 102: | Line 102: | ||
==Fights== | ==Fights== | ||
{| class="wikitable sortable" style="text-align: | {| class="wikitable sortable" style="text-align:center" | ||
!Zone | !Zone | ||
!Fight # | !Fight # | ||
!Image | ! colspan = 12 | Image & Name | ||
|- | |- | ||
| rowspan = | | rowspan = 6 |Tundra | ||
| rowspan = | | rowspan = 2 style="text-align:center;" |1 | ||
|[[File:The Bog Berries.png|90px]] | | colspan = 3 |[[File:The Bog Berries.png|90px]] || colspan = 3 |[[File:The Pengoons Fight.png|90px]] || colspan = 3 |[[File:The Snow Lumps.png|90px]] || colspan = 3 |[[File:The Snowbo Squad Fight.png|90px]] | ||
| | |||
|- | |- | ||
|[[ | | colspan = 3 |[[The Bog Berries]] || colspan = 3 |[[The Pengoons]] || colspan = 3 |[[The Snow Lumps]] || colspan = 3 |[[The Snowbo Squad]] | ||
| | |||
|- | |- | ||
|[[File:The | | rowspan = 2 style="text-align:center;" |2 | ||
| | | colspan = 3 |[[File:The Frost Shades Fight.png|90px]] || colspan = 3 |[[File:The Noxious Shrooms Fight.png|90px]] || colspan = 3 |[[File:The Globerries Fight.png|90px]] || colspan = 3 |[[File:The Snowland Bears Fight.png|90px]] | ||
|- | |- | ||
| | | colspan = 3 |[[The Frost Shades]] || colspan = 3 |[[The Noxious Shrooms]] || colspan = 3 |[[The Globerries]] || colspan = 3 |[[The Snowland Bears]] | ||
| | |||
| | |||
| | |||
| | |||
|- | |- | ||
| rowspan = 2 style="text-align:center;" |3 | | rowspan = 2 style="text-align:center;" |3 | ||
|[[File:Infernoko Fight.png|90px]] | | colspan = 6 | [[File:Infernoko Fight.png|90px]] || colspan = 6 | [[File:Bamboozle Fight.png|90px]] | ||
| | |||
|- | |- | ||
|[[ | | colspan = 6 | [[Infernoko Fight|Infernoko]] || colspan = 6 | [[Bamboozle Fight|Bamboozle]] | ||
| | |||
|- | |- | ||
| rowspan = | | rowspan = 6 |Ice Caves | ||
| rowspan = | | rowspan = 2 style="text-align:center;" |4 | ||
|[[File:The Spice Mokos Fight.png|90px]] | | colspan = 4 |[[File:The Spice Mokos Fight.png|90px]] || colspan = 4 |[[File:The Shelled Husks Fight.png|90px]] || colspan = 4 |[[File:The Demonhorn Goats Fight.png|90px]] | ||
| | |||
|- | |- | ||
|[[ | | colspan = 4 |[[The Spice Mokos]] || colspan = 4 |[[The Shelled Husks]] || colspan = 4 |[[The Demonhorn Goats]] | ||
| | |||
|- | |- | ||
|[[File:The | | rowspan = 2 style="text-align:center;" |5 | ||
| | | colspan = 4 |[[File:The Wooly Drek Fight.png|90px]] || colspan = 4 |[[File:The Ink Sacks.png|90px]] || colspan = 4 |[[File:The Toothy Shades Fight.png|90px]] | ||
|- | |- | ||
| | | colspan = 4 |[[The Wooly Drek]] || colspan = 4 |[[The Ink Sacks]] || colspan = 4 |[[The Toothy Shades]] | ||
|[[ | |||
| | |||
|- | |- | ||
|[[File: | | rowspan = 2 style="text-align:center;" |6 | ||
| | | colspan = 6 | [[File:Truffle Fight.png|90px]] || colspan = 6 | [[File:Krunker Fight.png|90px]] | ||
|- | |- | ||
| | | colspan = 6 | [[Truffle Fight|Truffle]] || colspan = 6 | [[Krunker Fight|Krunker]] | ||
|[[ | |||
| | |||
|- | |- | ||
|[[File: | | rowspan = 6 |Frostlands | ||
| | | rowspan = 2 style="text-align:center;" |7 | ||
| colspan = 4 |[[File:The Gunk Bugs.png|90px]] || colspan = 4 |[[File:The Ice Krabs Fight.png|90px]] || colspan = 4 |[[File:The Wild Hogs Fight.png|90px]] | |||
|- | |- | ||
| | | colspan = 4 |[[The Gunk Bugs]] || colspan = 4 |[[The Ice Krabs]] || colspan = 4 |[[The Wild Hogs]] | ||
| | |||
|[[ | |||
| | |||
|- | |- | ||
| | | rowspan = 2 style="text-align:center;" |8 | ||
| colspan = 12 |[[File:MapEyeOfTheStorm.png|200px]] | |||
|- | |- | ||
| | | colspan = 12 |[[Eye of the Storm]] | ||
|- | |- | ||
| style="text-align:center;" | | | rowspan = 2 style="text-align:center;" |9 | ||
|[[File: | | colspan = 12 |[[File:MapHeartOfTheStorm.png|150px]] | ||
|- | |- | ||
| | | colspan = 12 |[[Heart of the Storm]] | ||
|- | |- | ||
[[Category:Mechanics]] | [[Category:Mechanics]] | ||
Revision as of 22:06, 14 June 2024
The Map is where each run takes place. The player travels via a path of events across different stages. Each stage has two paths that connect a handful of events, ending with a Boss or Miniboss. The player chooses one path to follow, and visits each event on that path.
Zones
As players play through a run, they will pass through three zones on the map. Each zone varies the number of events encountered as well as different map decor and battle background. There are no zone-specific events, but some events are more likely to show up earlier/later in a run.
Snowdwell and Tundra
The players begin the journey by leaving Snowdwell and into the snowy lands beyond. Players will encounter 3-4 events between battles in this zone. These areas are depicted as snow-covered forests and plains with scattered rocks and distant mountain ranges.
Ice Caves
After beating the first boss, players move into the Ice Caves. In the Ice Caves, players will find 3-4 map events between battles. Here, one can find caves populated with massive ice stalagmites and stalactites with various creatures and debris frozen over.
Frostlands
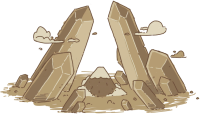
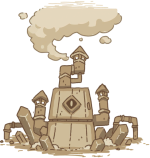
The areas beyond the second boss are known as the Frostlands. Players can expect to visit 1-2 events between battles, and it is here the player can find and fight the Eye of the Storm. This region has huge purple Frost formations and leftover equipment.
Map Events
The events a player encounters are strictly beneficial and sometimes offer Items or Bling, a new Companion, or a shop. The following are map events that can be encountered:
| Image | Event Name | Description | Notes |
|---|---|---|---|

|
Frozen Travellers | Lets you choose 1 of 3 randomly selected Companions to add to your deck. | Cannot be skipped, although unneeded companions can be reserved at any time. |

|
Treasure Chest | Lets you choose 1 of 3 randomly selected Items or Clunkers. | As of 1.05, may be skipped. |

|
Large Treasure Chest | (Removed in version 1.0.6) | Only appeared if the player had the Titan Bell active. |

|
Blingsnail Cave | Gives 40-80 gold | On average, gives 60 gold. |

|
Charm Dispenser | Gives the player a random charm. | |

|
Gnome Traveller | Displays 3 random Items or Clunkers (including those from other tribes), and the player may pick up any number of them. However, two of the items will have a second card visible behind them, forcing the player to also accept a Junk if they pick up one of those cards. | (unlocked at Icebreaker Cabin) |

|
Muncher | Allows the player to remove up to 2 cards in their deck, improving consistency. | |

|
Shade Sculptor | Allows the player to duplicate any Item or Clunker in their deck. The copied card retains all Charms, but not Crowns. | (unlocked at Icebreaker Cabin) |

|
The Woolly Snail | Allows the player to buy: up to 4 random Items (one of them always has a 50% discount), up to 3 random charms (costing 50, 70 and 90 blings respectively), and a crown for 75 blings. | |

|
Charm Merchant | Displays 3 charms for sale and a random card with a random charm attached to it. | (unlocked at Icebreaker Cabin) |

|
Injured Companion | Gives you an Injured Companion from the run before. | Only appears if the previous run was a loss. Cannot be skipped, although unneeded companions can be reserved at any time. |

|
Fight | ||

|
Boss Battle | ||

|
Eye of the Storm | ||

|
Heart of the Storm |
Fights
| Zone | Fight # | Image & Name | |||||||||||
|---|---|---|---|---|---|---|---|---|---|---|---|---|---|
| Tundra | 1 |  |
 |
 |

| ||||||||
| The Bog Berries | The Pengoons | The Snow Lumps | The Snowbo Squad | ||||||||||
| 2 |  |
 |
 |

| |||||||||
| The Frost Shades | The Noxious Shrooms | The Globerries | The Snowland Bears | ||||||||||
| 3 |  |

| |||||||||||
| Infernoko | Bamboozle | ||||||||||||
| Ice Caves | 4 |  |
 |

| |||||||||
| The Spice Mokos | The Shelled Husks | The Demonhorn Goats | |||||||||||
| 5 |  |
 |

| ||||||||||
| The Wooly Drek | The Ink Sacks | The Toothy Shades | |||||||||||
| 6 |  |

| |||||||||||
| Truffle | Krunker | ||||||||||||
| Frostlands | 7 |  |
 |

| |||||||||
| The Gunk Bugs | The Ice Krabs | The Wild Hogs | |||||||||||
| 8 | 
| ||||||||||||
| Eye of the Storm | |||||||||||||
| 9 | 
| ||||||||||||
| Heart of the Storm | |||||||||||||